Orange Icebox Cookies

I’ve never been a huge fan of refrigerator cookies.  When I think of them, I can only picture those ones you buy in the grocery store that kind of taste like cardboard.  A few weeks ago I found The Ultimate Cookie Book at a yard sale and it contained this recipe.  It looked good so I thought I’d give it a chance… I’m kind of glad I did… Kind of.

Cream together a half cup softened butter (unsalted) with 1 cup of sugar.  Add an egg and 1 tablespoon grated orange peel and mix well.

In another bowl mix together 1 and 3/4 cups flour, 1/4 teaspoon salt and 1/4 teaspoon baking soda.  Add this to the creamed mixture, mixing as you go.

On a floured surface, knead together the dough until it’s smooth.  Basically the heat from your hands will melt the butter enough to smooth it out.  Shape the dough into two rolls, about 1 and 1/2 inches in diameter each.  Flatten the tops out to make kind of an oval shape.  Now wrap these in waxed paper and chill overnight in the refrigerator.

The next day, add a few drops of yellow and red food coloring to 1/4 cup sugar. Mix together, then roll the dough in it.  Slice the dough to about 1/4 inch thick slices, and bake for 10-12 minutes at 375°F

To make the icing, mix 1/2 cup icing sugar and 22 tablespoons of orange juice.

Orange Icebox Cookies

These things are super addictive!  They were easy to make, and tasted so much better than I expected.  They were kind of like a shortbread cookie with a bit of orange taste.  I took some into the office and they went very quickly, with many people returning for a second cookie, and a third and…

The nice part about these is that they can be prepared the night before, and you can get around to it “whenever” the next day.  No timeline required.

Apple Cranberry Brie Panini

I had a wonderful grilled cheese sandwich at a food truck last year.  It was one of those “gourmet” sandwiches, and although it was delicious it was way out of my price range and not something I can afford on a regular basis.  On top of that, the food truck is no longer around, so even if I want one I can’t have it.

I decided to make my own… with some modifications.

First, I decided that I wanted to make it less difficult to cook, so I elected to make a panini instead (my panini maker was a wonderful Christmas gift I received one year – I have this one).  They’re easy to make – you butter the outside of the bread, make your sandwich like normal, then throw it in the panini press until everything is hot and melty.

I used italian bread, the kind you cut yourself nice and thick.  It holds up better than regular bread.  I also needed butter (or margarine), cranberry sauce, brie and an apple.

AppleCranberryBriePanini1

Cut the bread into thickish slices and butter the outside.  Lay down a layer of cranberry sauce.

AppleCranberryBriePanini2

Slice the apple (I think green apple would work best) super thin and put down a layer.

AppleCranberryBriePanini3

Slice your brie and put that on top of the apples.  Too thick and it’ll take a while to melt, but you don’t want to go too skimpy on the cheese either.

AppleCranberryBriePanini4

AppleCranberryBriePanini5

Put your bread on top and throw it in the panini press until the cheese is melted and everything is hot.  If you don’t have one, you can always just fry it up like a regular grilled cheese.  These things are really addictive.  Consider yourself warned.

AppleCranberryBriePanini6

Caramel Apple Nut Pie

One Thanksgiving we went to Cracker Barrel, and we had this pie like nothing I’d had before.  It was so good we were still looking for a copycat recipe two years later.  I’d given up hope when I came across this recipe for “Caramel Apple Nut Pie” in an old cookbook (Simply Delicious Cooking 2) that I’d picked up at a yard sale.  I really don’t know if it tastes like the pie at the restaurant, but it’s good like I remember that one being.  It will just have to do 🙂

First thing’s first, you’re going to need a raw pie crust.  If you’re making your own, cut it into a 9 inch pie plate.  I decided to do a fair bit of cooking that day, so needed several crusts.

applepie01

I made two of these pies at the same time, but I’ll give you the measurements for one.  Slice up 3 cups of apples and lay them in the bottom of the crust.

applepie02

Now when you’re prepping for this, I should warn you that you don’t need to buy 2 bags of apples for this like I did… Next you’ll want to unwrap 20 of those caramel candies that taste so good.  You’ll want extra, because if you’re like me you’ll be stuffing them into your face the entire time you’re cooking.

applepie03

You’re going to melt them in a double boiler.  I don’t have one and I have a habit of getting water in things when I use 2 pots, so I use a metal bowl that has a slightly bigger top than the pot with the water.  I can let go and it works well.

applepie04

Seriously, this step takes forever.  Maybe I’m being overdramatic.  Nope, no I’m not.  It takes forever.

Once they actually melt, stir in 1/2 teaspoon vanilla.  I didn’t have a lot of patience, and I don’t think they were melted as well as they should have been but it was fine.

applepie08

And sticky!  What a mess!  Okay, so you’re going to “pour” this over the apples in the pie shell.  I found using a spoon to kind of drizzle it worked better, but even then it wasn’t easy.  It’s fine though.  Nobody will actually see this part and you really are just trying to get somewhat even coverage.

applepie05

Grab a bowl and mix up 1/3 cup flour, 1/4 teaspoon cinnamon and 3 tablespoons sugar.  With a pastry blender or a couple knives (seriously though a pastry blender is cheap, I’d get one) cut in 3 tablespoons butter.  You want the mixture to be crumbly and you don’t want to use your hands because you don’t want the butter melting.  To this add 1/3 cup chopped pecans and mix (keeping your warm hands away from it).

applepie06

Next?  You guessed it: pour this over the apples too.  Spread it out as evenly as you can without using your hands.

applepie07

You’re going to bake this at 350 degrees Fahrenheit (make sure the oven is preheated) for about 40 minutes.

applepie09

applepie10

As usual, keep an eye on this because all ovens are different.  I took mine out when I noticed the pecans were burning.  Thankfully I got to it before the taste permeated anything.

applepie11

Cool completely before serving.  That caramel heats up and you don’t want to burn yourself.  I kept these in the fridge and they were gone in 2 days flat.  Yes, both of them.

applepie12

It’s a lot of work, but making two at once is easier (except the melting caramels part).  I think this would make an excellent fall pie.

Sugar Cream Pie

I’ve been baking, but I haven’t been keeping up with the blog.  Summer is always busy, and with this being my first summer as a homeowner I’m discovering it’s a lot more work than I’m used to.

I wanted to find some lighter food for the summer and thought I’d test out this sugar cream pie recipe from my green edition of Taste of Home magazine (Winter, 2014, Five Star Deserts).  As long as you have a pie crust, this takes ingredients that you should have on hand.  In my case, I had a left over pie crust from something else I was doing, so it wasn’t an issue.

First, cook your pie crust but undercook it a bit, and let it cool.  A store bought one is easy, and I think they’re simple to cook.  Don’t overdo it.  The recipe says to cook until light brown, so about 5-7 minutes.  Mine took quite a bit longer, but I had a thicker crust I think.

In a large saucepan, combine 1 cup sugar and 1/4 cup cornstarch.  Now stir in 2 cups of 2% milk until it’s smooth.

SugarPie01

You’re going to bring this to a boils, then reduce the heat and stir either 2 minutes or until thick and bubbly.  Maybe I did something wrong, but mine took a lot longer.

Take it off the burner and stir in 1/2 cup butter (cut it into cubes first) and 1 teaspoon vanilla extract.

Pour this into the crust.

SugarPie02

Sprinkle the top with about 1/4 teaspoon cinnamon and then bake 15-20 minutes at 450 degrees.  The top should be golden brown.

SugarPie03

Mine was starting to burn in places and was boiling over so I took it out when it looked like the photo above… BUT it was in there a lot longer than 20 minutes.  Closer to 40 in fact.  It didn’t actually burn, but never turned golden brown either.

That could be because I put a cookie sheet under it.  I did this because the foil pie tin wasn’t strong enough for this pie.

Anyway, once you cool it just put it in the fridge to chill before serving.

SugarPie04

I didn’t like this at all.  It tasted more like custard than pie to me, which is something I absolutely despise.  I *think* it actually turned out quite well, but wasn’t something I enjoyed.  I’d love for someone else to test it out and let me know what they think.

Kahlua Fudge Sheet Cake

My Taste of Home Five Star Desserts magazine (2015) has produced winner after winner.  This was the first fail.  Oh it cooked up fine, even after me messing it up (more on that later), but I still wasn’t happy…

First thing is first.  If you like a very strong Kahlua flavor you’ll probably like this cake.  I’m not one of those people, even though I held out hope.  So if you want to play along, here we go.

Preheat your oven to 350 degrees Fahrenheit, and greast a 10×15 inch baking pan.  I didn’t have anything that big, so I used a 10×13.  Not a big deal at all.

kahlua01

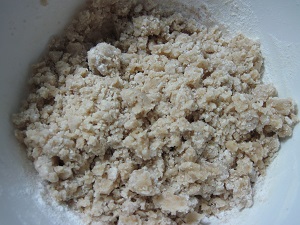
Grab a large bowl (a really large one) and whisk together 2 cups flour, 1 3/4 cups sugar, 2 teaspoons cinnamon and 1 teaspoon baking soda. Set it aside for now because you’ll need it later.

kahlua02

kahlua03

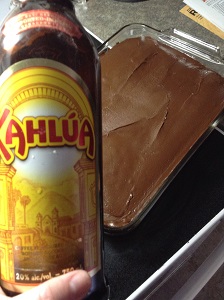
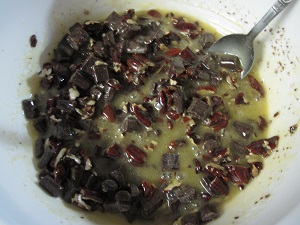
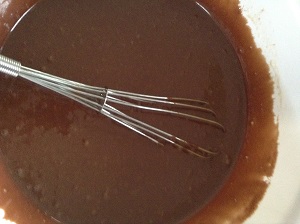
In a small saucepan (but not too small), combine 1 cup Kahlua (tip: if you don’t want to use liquor, you can use strongly brewed coffee instead), 1/2 cup butter (cubed), 1/2 cup Fluff and 1/3 cup cocoa powder.

kahlua04

Bring this to a boil, stirring occasionally.  It doesn’t look very good while it’s melting.

kahlua05

But it does smell pretty good!

kahlua06

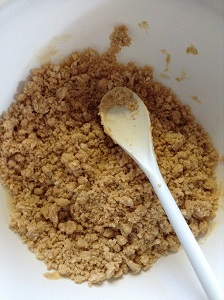
Once boiling, add this to the flour mixture from before, stirring until just combined.

kahlua07

It gets super thick, and smells really good.

kahlua08

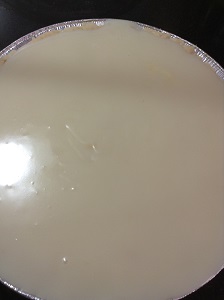
In another bowl, whisk together 2 eggs and 1/2 cup buttermilk until blended.  Now, if you don’t have buttermilk on hand (and realistically, who does?) you can make your own by adding about a teaspoon of white vinegar into a measuring cup then adding milk until it totals 1 cup.  Leave it set for 10 minutes or so and you have buttermilk.  Here’s where I made *my* mistake.  I did this, and then  didn’t read the recipe carefully and added the *whole* cup.  Oopsies.  I’m usually a stickler for details, but what with taking photos and trying to get this thing going I really didn’t handle this too well.

kahlua09

So add this to the other bowl, whisking constantly.  This is where I noticed my mistake, because my batter was way too thin.

kahlua11

Fold in 1/2 cup chopped pecans.

Pour this in the pan and spread it out evenly.  In my case the spreading wasn’t required. 🙂

kahlua12

Bake 18-22 minutes, or until a toothpick in the center comes out clean.  Mine took quite a while longer with the extra liquid.  It cooked up fine actually, although my oven is unbalanced so my cakes often come out lopsided.  I really need to fix that one of these days.

kahlua15

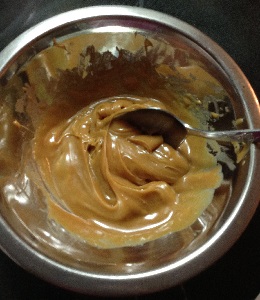
Anyway, the frosting needs to be spread onto a warm cake (not piping hot, just warm) so you should make that before the cake is completely done.  In a small saucepan, combine 1/2 cup of cubed butter, 1/3 cup cocoa powder and 1/4 cup of Fluff.  Stir this over medium heat until smooth.

kahlua13

Pour the mix into a bowl and add 3 3/4 cups icing sugar.  Also mix in just enough Kahlua to make the mix spreadable.  You can expect somewhere between 1/2 cup and 2/3 cup.  Keep in mind the more you add the stronger the flavor.

kahlua14

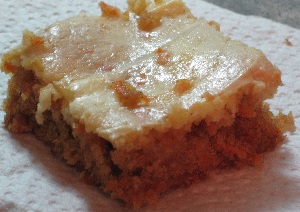
Spread the frosting on top of the cake while it’s still warm and sprinkle the top with 1/4 cup chopped pecans (although I skipped this bit)

kahlua17

As good as this cake looked and smelled, it definitely tasted very strongly of Kahlua.  I wasn’t happy with it and no one else who tried it here liked it either.  This is the first time I’ve had to throw out a baked good in over a year I think.  But maybe you like that flavor and if so you should love this thing.  If you manage to do this without screwing up the amount of buttermilk I’d love to hear the results… mostly to make sure it wasn’t just me messing this up…

kahlua16

kahlua18

Peanut Butter And Jelly Thumbprints

May the Fourth be with you!

All right, now that I got that out of the way…

This is my earliest memory of baking.  I was at a sleepover at a friend’s house and her Mom let us make cookies.  Looking back, it was a very simple recipe.  But for me, it was a big deal.  My mother was very young when she had me and (from my understanding) wasn’t the best cook.  So I wasn’t really allowed to be underfoot in the kitchen.  My friend’s mother stood me at the kitchen table and walked me through the process of making cookies.  I think my friend was actually baking them while I mixed them up.

They may not have been this exact recipe, but they were close to it.  It comes from my Old Fashioned Cookies recipe book.

This is a great one to do with kids.  It doesn’t require a mixer, it’s one bowl, and it’s pretty hard to mess it up.

In a large bowl, combine 1 and 1/2 cups flour, 1/2 cup sugar, 1/2 teaspoon baking soda and 1/4 teaspoon salt.

thumbprints1

Add 3/4 cup creamy peanut butter and 1/3 cup softened butter, mix until crumbly. Stir in 1/4 cup honey and 1 tablespoon milk.

thumbprints2

Shape into 1 inch balls. Place 2 inches apart on ungreased baking sheets.

thumbprints3

Press thumb into center of each ball and add ½ teaspoon jelly (I actually used homemade jam).

thumbprints4

Bake at 375°F for 8-10 minutes. Let cool on baking sheet 1 minute before transferring to wire racks.

thumbprints5

Make sure these are good and cool before you try and eat them.  The jam stays hot a long time, so it’s really easy to burn yourself.

Chunky Pecan Pie Bars

You may not believe this, but I’ve never had pecan pie.  I’m guessing this must be what it tastes like.  At least, I hope so, since they’re pretty darned good…  Maybe someday I’ll try to make an actual pecan pie, but for now I’m still working my way through my recipe books.  This is another from my Old Fashioned Cookies book, from 2004.

Pecans are getting crazy expensive, but buying them in bulk can cut down costs.  I also often put pecans in recipes instead of walnuts because they’re cheaper (and taste better to me).

Okay, so this recipe isn’t nearly as bad as I thought it would be.  Take a 9×13 inch baking pan and grease it.  Set it aside and preheat your oven to 350 degrees.

In a small-ish bowl, beat together 1/2 cup butter or margarine (softened), 1 and 1/2 cups flour and 1/2 cup packed brown sugar until it’s crumbly.

PecanPie1

Press this mixture into the bottom of your pan.  And for the record, yes, it tastes like pie crust.  Throw it into the oven and bake 12-15 minutes or until brown.  Don’t overcook it because you’ll be putting it back in later.

PecanPie5

Set that aside, and while it’s cooling we’ll make the filling.  I wound up using light corn syrup for this instead of dark (the recipe didn’t specify), so whatever you want to use is fine.

PecanPie2

Beat together 3 large eggs, 3/4 cup granulated (normal) sugar, 3/4 cup corn syrup, 2 tablespoons butter or margarine (melted) and 1 teaspoon vanilla extract.

PecanPie3

Stir in 1 and 1/2 cups coarsely chopped pecans along with 1 and 3/4 cups semi sweet chocolate chunks.  That’s a 11.5 ounce package if you’re using these:

PecanPie4

I really had a hard time not just eating the bag.  Yummy…  Anyway, I also had a hard time finding those.  I wound up finding them in a Wal-Mart in the US.  You want the chunks, not the morsels, and as of the time of writing this they are still available on their website.

Once you’ve got that all mixed up it’ll be kind of a runny mixture with chunks of goodies.

PecanPie6

Pour this right over the crust, and spread it out as evenly as you can.

PecanPie7

Since you’re oven is already hot you can just pop this in and bake it for 25-30 minutes or until set.  I found that timing to be about right.

PecanPie8

Once you take it out, cool it in the pan and then cut it into bars.  These were so much better than I thought they’d be!  And a lot easier to make than I thought when I first looked at them.  They taste a lot more like chocolate than I expected, but I don’t think I’ve ever made anything with chocolate chunks before.  Anyway, if you make them I’d love to know your results.  (as usual)

PecanPie9

Carrot Cake Bars

I like carrot cake.  I can’t say that I love it, but it’s one of those things that once in a while is just delicious.  I was visiting family recently and had a slice.  It was good, but I felt like I wanted something different.  I came across this recipe in a What’s Cooking magazine from Spring 2004.  It was different, but not too different.

First up, take a smallish bowl and mix together 1 1/4 cups flour, 1 teaspoon baking powder, 1 teaspoon cinnamon and 1/8 teaspoon nutmeg.  Set that aside for now.

In a large bowl (probably your mixer bowl?) beat 3/4 cup butter (softened, of course), 1 cup packed brown sugar and 1/2 cup granular sugar (that’s the normal stuff) with your mixer until well blended.

Add in 2 eggs and 1 cup shredded carrots (about 2 carrots) and mix that until well blended.

Remember that bowl with the flour mixture from earlier?  Grab that and add it in a little at a time.  Mix until well blended.

Take this mixture and spread it on the bottom of a 9×13 inch pan.  Set that aside.

Now that your mixing bowl is all cleaned out you can beat in 1 package (8oz) cream cheese (softened a bit) and 1/4 cup granulated sugar until well blended.

Add one more egg and 2 tablespoons of flour and mix until just blended.

Drop this mixture by spoonfuls all around the top of the other stuff in the pan, and swirl it around gently to kind of combine.

Cook this at 350°F for 30-35 minutes, or until a toothpick inserted into the center comes out clean, whatever comes first.

carrotcakesquares2

Once these cool, they taste quite a bit like iced carrot cake, in a handy compact package.  These are great to take in lunches, because bars aren’t quite so messy.  As complicated at this recipe seems, it’s really not that bad.  If you try these, let me know in the comments below how you made out.

CarrotCakeSquares

Fettuccine Alfredo

I’m not a fan of cream sauces.  Never have been.  But I love cheese, and now that I know what goes into Fettuccine Alfredo I’ve decided I like it.  That’s unfortunate, because it really is a heart attack on a plate.  No photos, but here’s what I did:

Pour your water in a pot and start heating it (to boil the pasta).

Take a big saucepan (I’ve got a great big one that’s really deep with a lid – that works great for this) and put the burner on low.  Break up a stick of unsalted butter into the pan (about 8 TBSP) and heat until it’s melted.

In the meantime, once your water is boiling you can add about 400 grams of dry fettuccine noodles (regular old dry packaged stuff, NOT fresh) into that pot.

Once your butter is melted, put about 1/2 to 1 tablespoon of garlic salt into it (whatever you like, you can even leave it out) and mix it until it dissolves.  Turn off the burner and leave the butter there.

Cook your pasta until it’s just about as cooked as you like it.  The dish will turn out better if the pasta isn’t overcooked.  Once that’s done, take some tongs and grab the noodles from the pot and put them directly into the saucepan.  It’s very important not to drain them.

Turn the heat on the saucepan to medium and immediately mix the noodles with the butter to coat them.  As soon as they’re wet, throw in about 2/3 cups of finely shredded fresh parmesan cheese and stir until the cheese melts.  If it seems a little dry toss in a bit (like a tablespoon or two) of the pasta water.  Once all the cheese is incorporated then throw in another 2/3 cup (or in my case 3/4 cup) and repeat the process.

If done correctly (and I didn’t find it too hard) you’ll wind up with the type of sauce you’d expect to see in a restaurant.  Immediately put this in bowls and enjoy with a little black pepper on top.  Alfredo is a rather delicate sauce and I’ve heard it doesn’t keep well, so you may want to cut all the amounts in half to avoid leftovers.  You could always serve a little garlic bread or something with it to stretch it.  It’s a pretty rich meal so that might make it a bit better.

Texas Roadhouse

A couple of months ago I visited the Texas Roadhouse in Bangor, Maine.  I’ve been letting stuff pile up lately, so I may have a few of these posts from past visits popping up.  Just bear with me and they will be over soon.  I tried their Beef Tips, which were overall good.  They weren’t anything special, but they were good.

BeefTips

The person I was with had some sort of Chicken dish.  I think these were the Chicken Fingers, or some similar sort of name:

ChickenFingers

I found the chicken to be really well done and was very impressed with it.  There was a TON of food on that plate, even though it doesn’t look like it.  I bet the chicken strips were about 1/2 a chicken breast each.

The prices are also quite reasonable.

We had a starter of tater skins as well, which were fabulous!

IMG_7268

If you haven’t been to the Texas Roadhouse before, they do some line dancing and the place is themed.  My favorite part is the fresh rolls they bring out before the meal.  They are warm and have whipped butter with cinnamon in it.  They are absolutely fantastic, and the sole reason I go there whenever I can.  Unfortunately, they haven’t been very good our last couple of trips, and sometimes have been overcooked.  I know they’re usually busy, so lets home they can remedy this before I have to learn to make my own.